

In my last post I talked about bubbles caught in a frozen lake (click HERE to go to that post). In this episode I will talk about a different type of frozen bubbles – ones you can create in your backyard! But you will now have to wait until next winter to try it.
A couple of years ago I read an article by a friend, Mark Hughes, on how to photograph frozen bubbles. As I was spending winters in California, I found it interesting but not something that I thought I would have a chance to try out. Here is a link to Mark’s article How to Photograph Frozen Bubbles in the Cold.
As an aside, Mark has recently started up a YouTube channel. His recent post on filters will be of interest to photographers contemplating the purchase of various filters for their camera. Check it out HERE, and while you are there, why not subscribe to his channel!
But I digress. The current pandemic forced us to spend our winter this year in Alberta, which gave me a chance to try out some different “winter” photography. One project I thought I would try is photographing freezing bubbles.
Mark’s article very clearly outlines the process involved so I won’t go into great amount of detail. The most basic “ingredient” you need is cold weather: essentially temperatures that are -20 C or colder (-4 F). I have read accounts by others who have had variable success at temperatures in the -10 to -20 C (+14 to -4 F) range but suffice to say, the colder the better.
A second, equally important requirement is that it should be as windless as possible. Even the slightest of breezes blows the bubbles around, causing them to burst almost as fast as you blow them.
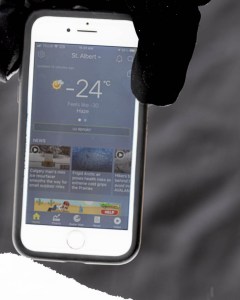
Back in February, we had a period where temperatures during the day were around -20 or colder, so it seemed like an ideal time for my project.
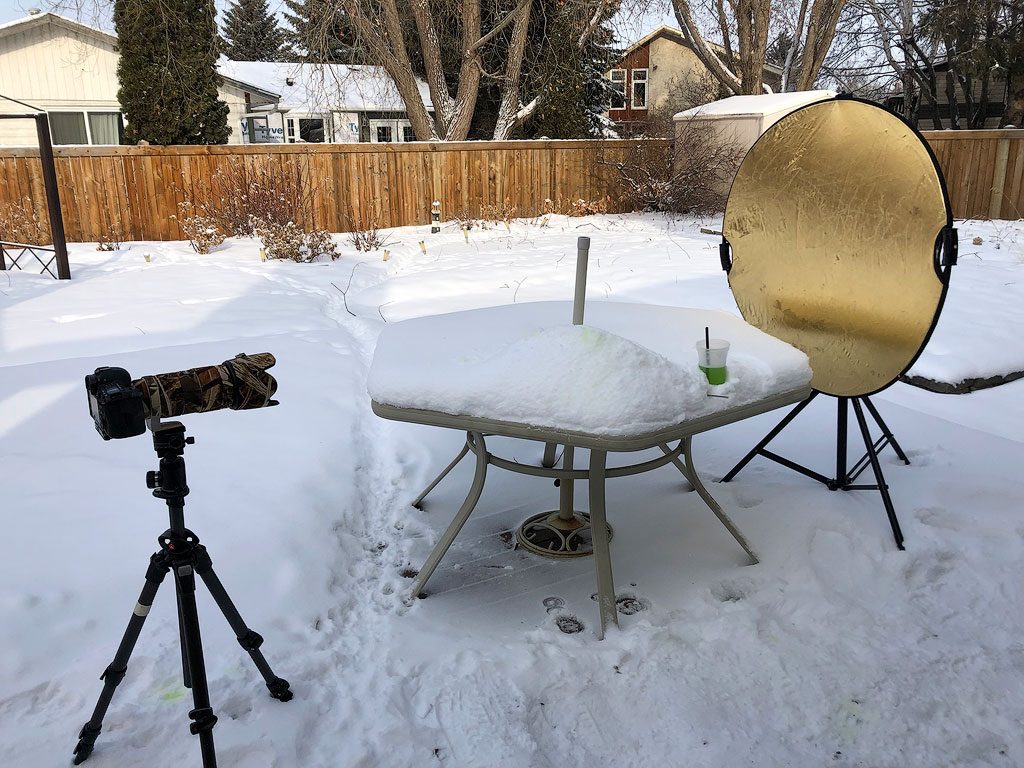
My shooting location was the snow-covered table on our deck. Armed with my soap solution of water, dish detergent and glycerin, created using Mark’s formula, I ventured out one cold morning.
I made two discoveries that first morning. First of all, blowing bubbles and getting them to land where you want them is not that easy. Secondly, when they did land on the table and I was able to get a shot or two, I found that the flat table had too much snow showing behind the bubble, with the result that it was very hard to differentiate the bubble from the snow. But, and it’s an important but, I did witness the phenomenon of bubbles freezing.
Not to be deterred, I tried again the next day. To solve the “flat table” problem, I built up a ridge on one side of the table by piling up a few pieces of wood then covering them with snow. This provided much better results. However, I wasn’t all that enamored with the background, and there really wasn’t anything that would provide a better background in my backyard merely by changing my viewing angle. As I could only last outside, given the temperature, for about 20 or 30 minutes, I decided that seeking a solution to the background issue could wait until another day.
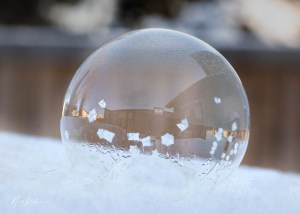
A few days later, ideal conditions again presented themselves. I decided that if I didn’t like the background, then I should create my own. I hung a reflector behind my shooting area and found that this worked quite well. I tried different reflectors and found that the gold and silver ones didn’t work that well while the white and black reflectors worked the best.
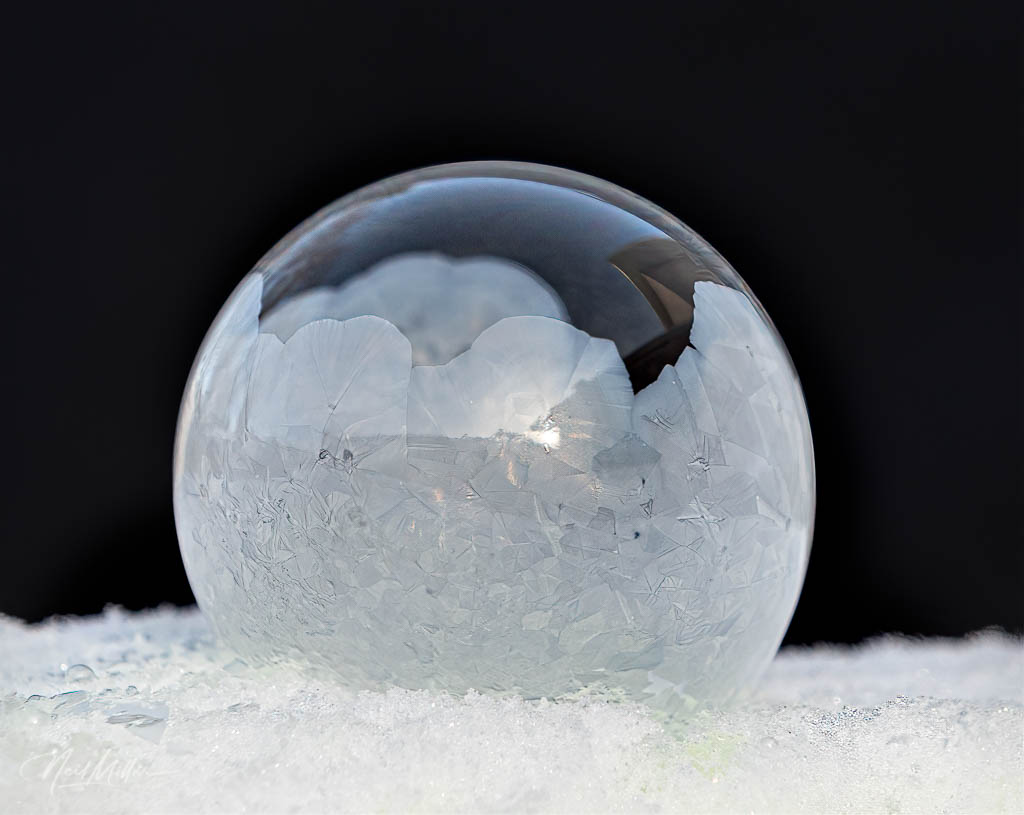
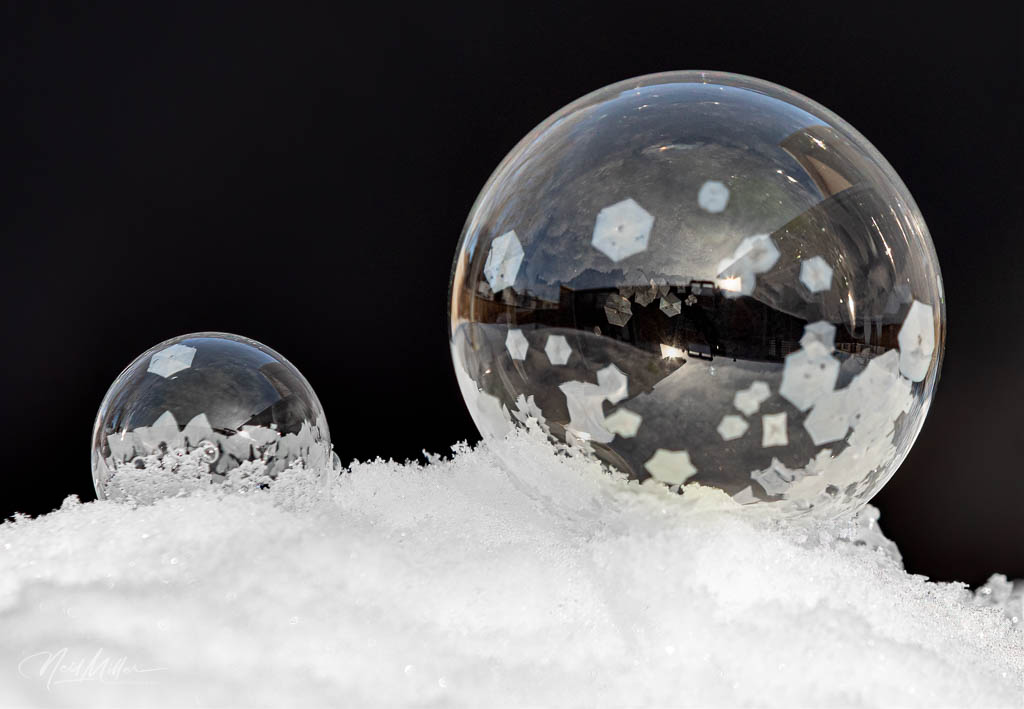
Here are a couple of examples with the black background.
At best, once you have successfully blown a bubble and got it to land near the ideal location, you have about 20 to 30 seconds to get to the camera and fire off a series of shots, before the bubble bursts. Often, they burst before I could get to the camera.
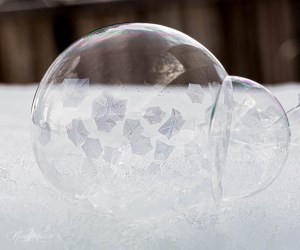
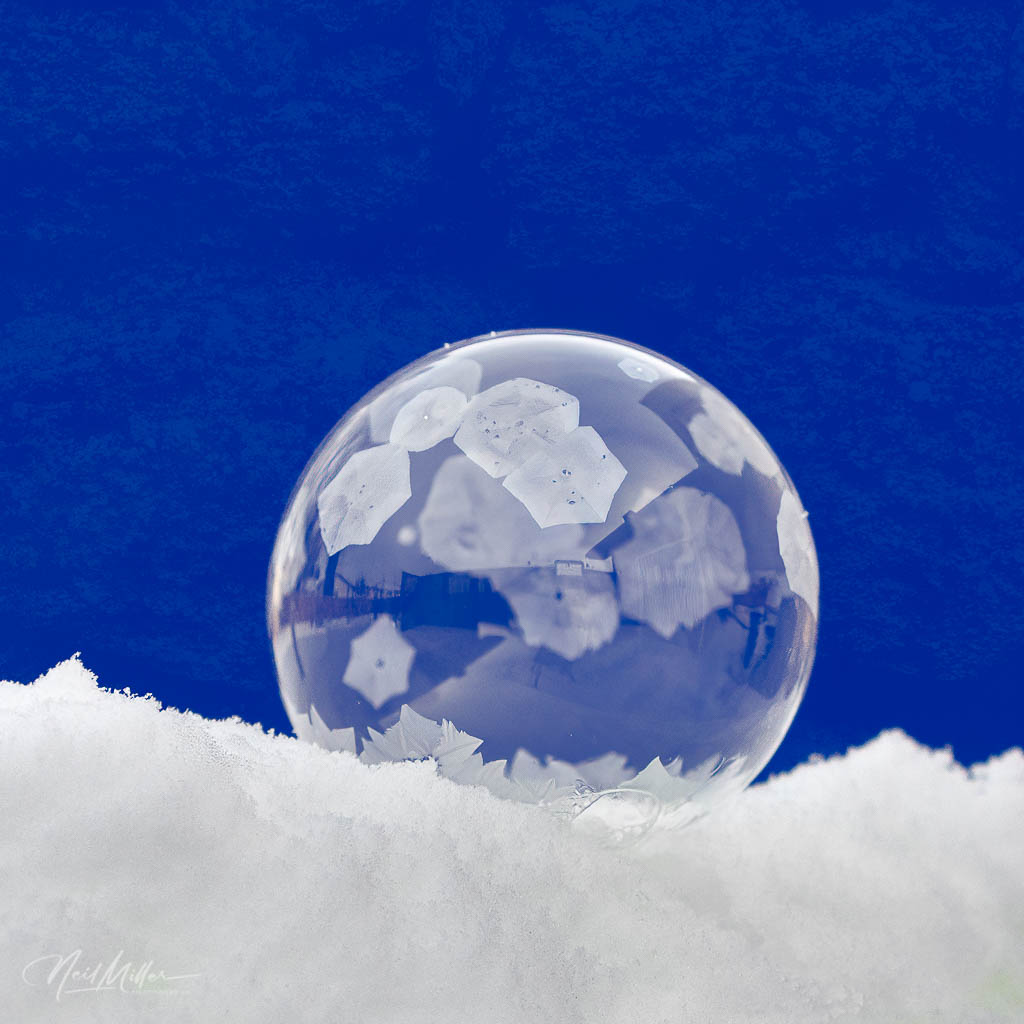
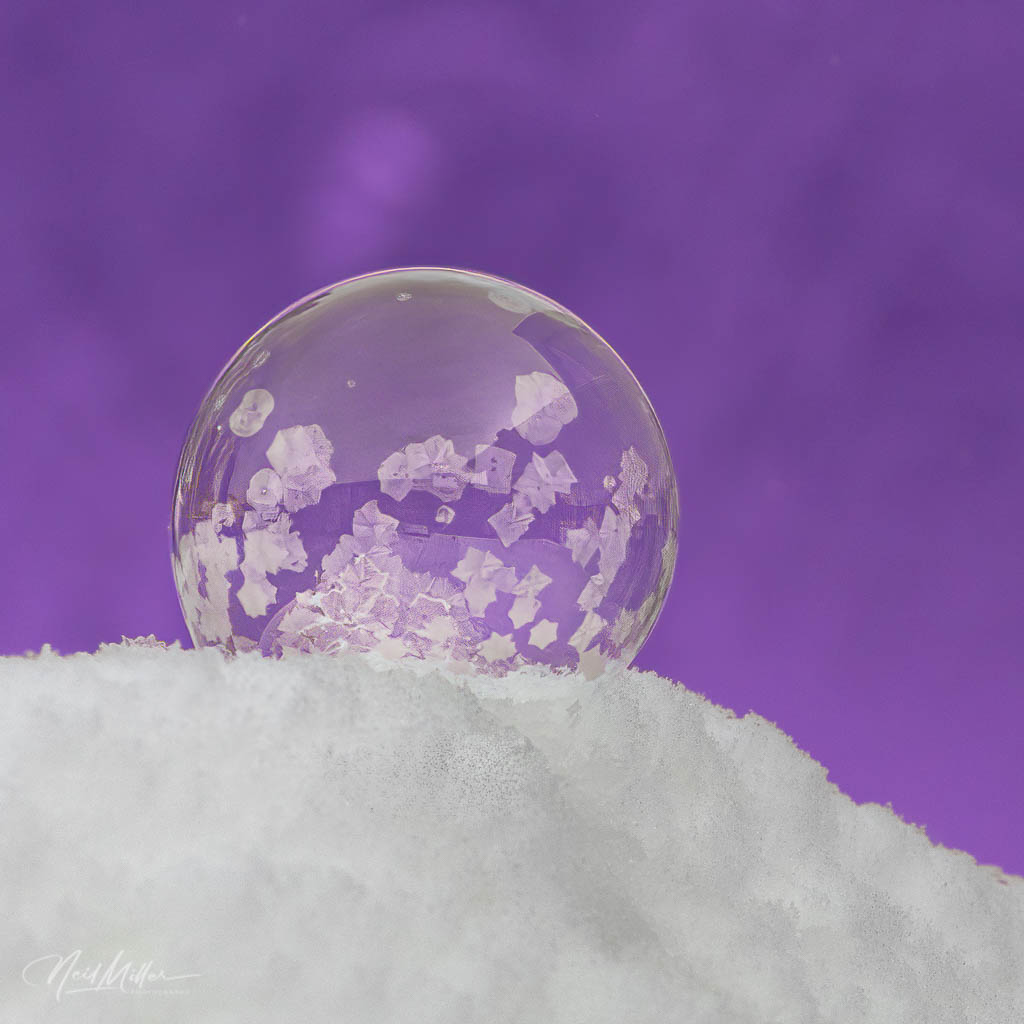
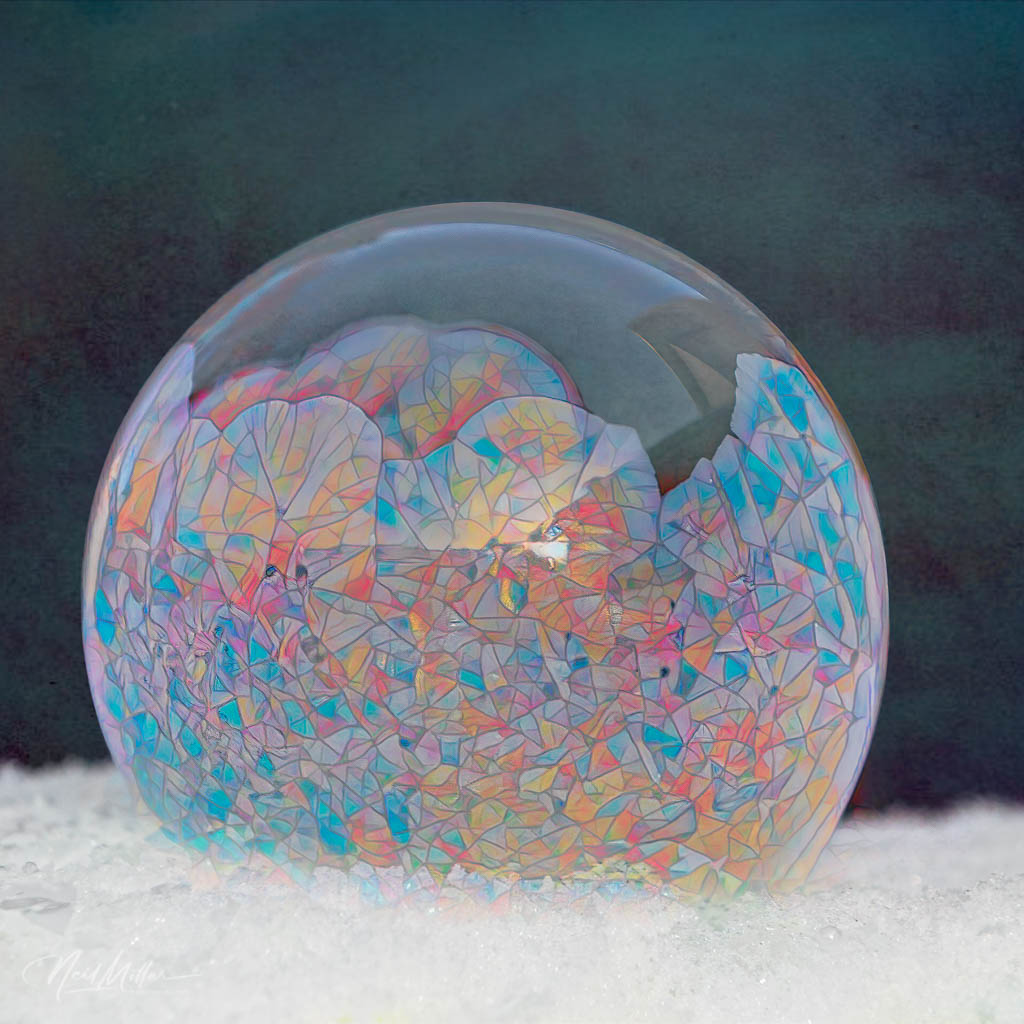
Something I found fascinating was the process as the bubbles froze. Initially a few frozen patches appear and start to float around the surface of the bubble. As more patches form the movement stops. The patches continue to increase in number and size until they pretty much cover the entire surface of the bubble. If the bubble has survived this long, it generally pops soon after the entire surface has frozen.
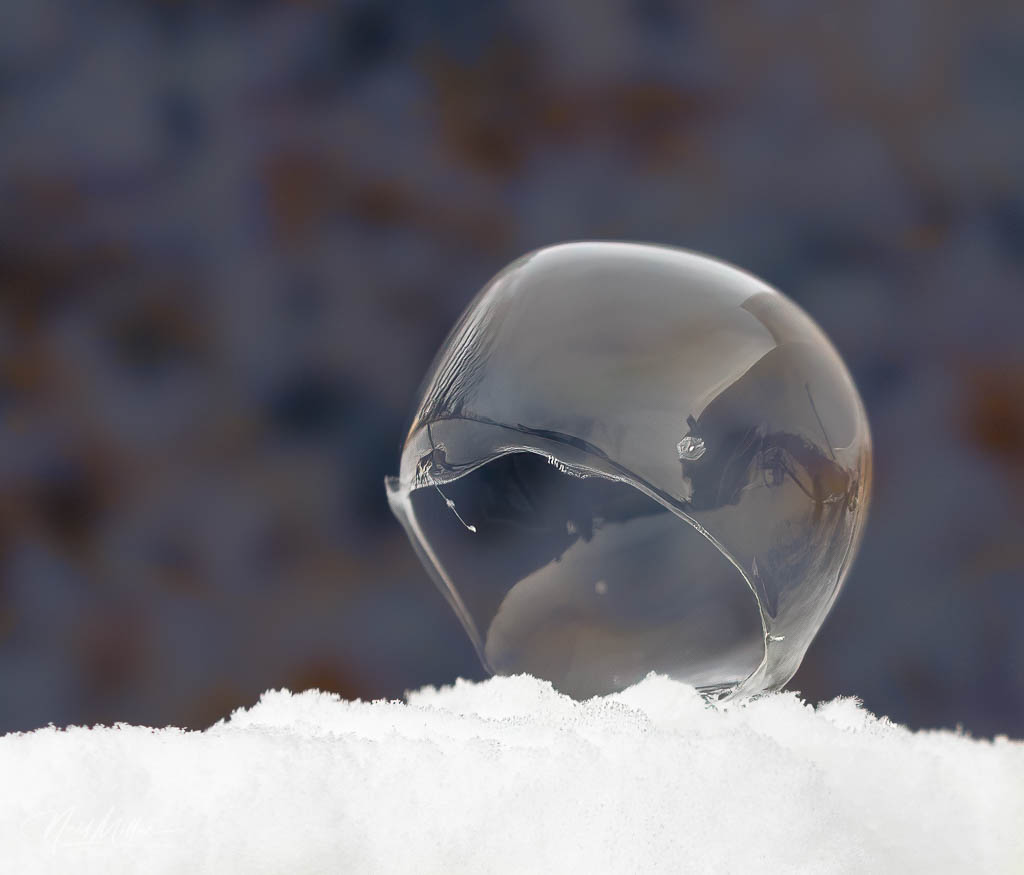
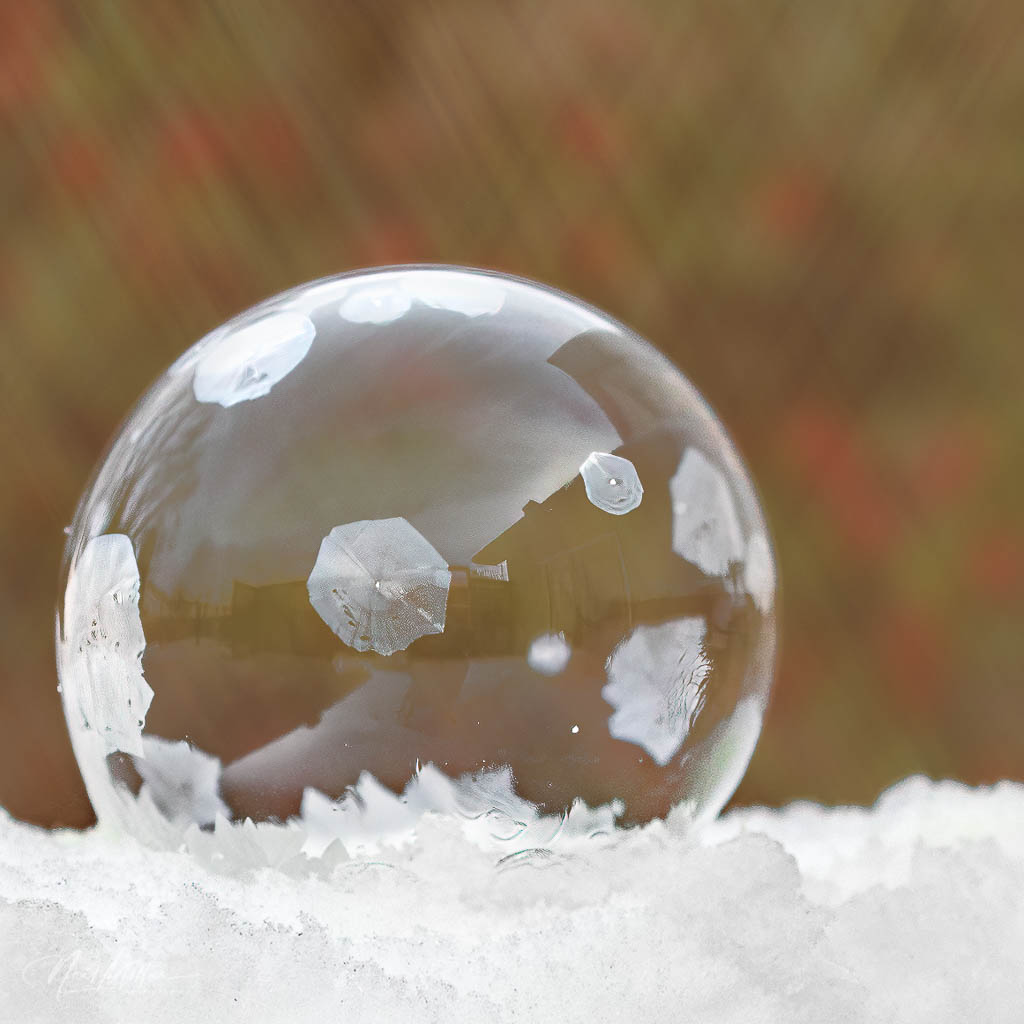
By using my own solid color backgrounds, I found it was quite easy to change the background to something else in post-processing. Here are some examples. In the final example, I also created a “stained glass” appearance to the frozen patches.
Have you tried photographing freezing bubbles? If so, I would love to hear of your experiences in the comment section below.

Leave a comment